sydney jacket in bergen

sydney_jacket-3

Fabric: About 1.3 meters of boiled woven wool, 1.5 meters wide. I was gifted the fabric some years ago by a sweet fellow sewist, and I’m so glad to finally have found the right project for this dusty colored wool.
Pattern: Sydney jacket, from Tessuti fabrics.
Techniques: topstitching.

sydney_jacket-1Feeling just a *bit* awkward posing with my tripod, on the street in my neighbourhood this past extremely windy Sunday afternoon. Yep, just me and the brunch crowd hanging around!

Oh, man – I love this jacket. It’s maybe not the most year-round kind of jacket, but damn, I feel stylish in this! I’m not quite sure what to say that hasn’t already been mentioned by the many, many bloggers who have made this jacket already since the release last year. I will try. I mean, words usually have to be dragged out of me, so I hope you all are aware of what sort of sacrifice this is for me. (I kid. I have so many words inside me. Just in general I mean.)

sydney_jacket-2I was too impatient to steam the jacket before wearing it out!

The construction is, as noted many places, a little different, but in a fun way. The seams are all overlapped and topstitched down. I ended up doing double rows of stitches just to make the seams more secure, plus I think it looks nice. Starting a Saturday morning in a mad dash of inspiration, I was not about to leave the house to buy me some fabric-matching thread, so I made do with what I had. I chose a warm sable kind of color, which I think went well with the dusty rosy mauve of the wool. It certainly does not match, but it’s not exactly a contrast color either – it just gives a bit of dimension!

This was not a difficult jacket to make. I spent three leisurely hours (including some unpicking and a snack break) one morning after realizing this fabric in my stash was a perfect fit for the pattern I assembled and cut the previous night. I was on my way to pull out a thicker grey felted wool when this softer boiled wool just sang out for my attention. What could I do but obey? Based on other bloggers notes about the roominess I decided to cut the petite size, with the added 1 cm length of the size small. I’m happy with the ease I have in the finished jacket – I certainly wouldn’t want it any larger (I’m 5’4″/164 cm for reference). I have to say… as soon as I put it on I knew that grey felted wool is coming out after all. I want another one! So cozy and warm! I mean, it won’t really hold up to cold days or superwindy days, but I most definitely felt the added warmth of wearing this jacket!

sydney_jacket-6

I can’t get over how pulled together, slightly artistic and cool I felt wearing this. I’m not even sure I know what I think this word means, but I felt chic damnit. There. I said it. Now – go make yourself one of these. I’ll be back soon with some knits I’ve finished, in my favorite color ever. Oh, the suspense! ;)

a tale of two city pants

Did I make the jumpsuit Gillian dared me to make? I did not. Did I make pants a while ago and pair them with a new top I just finished? I did. (Did I binge-watch Elementary and now have Sherlock’s voice in my head? I did. Did I also just write a 1200-word count post? I did.)

citypants (7)

citypants (8)

Fabric: 1 meter of printed viscose from Stoff & Stil.
Pattern: Alexandria pants pattern by Named patterns, modified size EU38.
Techniques: Overlocking, gusset, understitching, elastic waist.

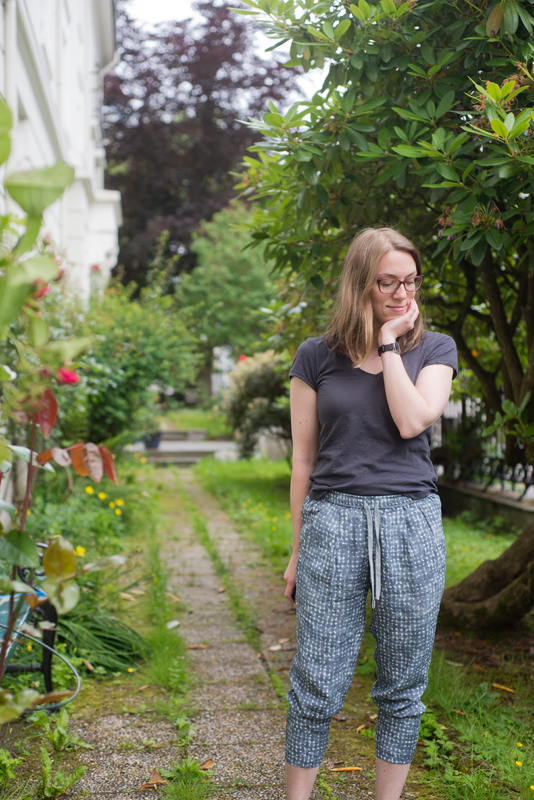
Last year I found myself getting more adventurous with both patterned fabrics and silhouettes in clothes – I think as part of a post-break-up shake-up. I wore a patterned strapless jumpsuit, and absolutely loved it! The Hudson pants by True Bias was making its rounds, and I was keen to try the city pants style too. (Is it called city pants? Ok, google says yes.) Since the Hudson pants is for knits and I had a cool viscose woven I thought would be perfect for city-like pants, I went for the Alexandria pants pattern by Named patterns instead. Ugh. Sorry – my gut reaction mentioning that pattern is not a good one! I’ll go into details, but basically… the pattern irritated me. Irritates me.

I love the detail of the pocket sort of hiding in a pleat, and I think the pants look really good on their model, and I’d love to make it up in a black silk crepe I have, and I think it would make some really sleek dressy pants. I just know have a decent amount of fit issues to overcome first, which does not fill me with joy!

citypants (3)I took all these pictures practically in someones yard – it was inside the fenced area of an apartment building. Did I feel awkward? Yes. Am I really glad nobody living in the building went in or came out while I was taking pictures? Oh, really yes.

One of the most irritating things first – the pdf pattern. It has I think 1 cm seam allowance included, which I like (I’m solidly in the included seam allowance camp!), but apparently only on the pdf pattern? Does that mean the printed pattern does not include seam allowance? Huh. Anyways, They have separate files for separate size bundles, with sizes EU36 and EU38 together. You’d think that could get annoying if you wanted to grade between sizes beyond those two, but wait! You can’t grade between the two sizes given in the same file anyways! The two sizes aren’t nested you see, but offset. I can’t understand the point of doing it this way, I really can’t. I’m having a hard time keeping my irritation at bay here, and as much as I like the design I don’t like that the pattern is set up differently than what has become the standard. I don’t mind just because it’s different from what I’m used to, but because it’s different with no added benefit, but actually reduced usability!

citypants (4)

Ok. Deep breath. Back to the facts: I cut a straight size EU38, since my hip width indicated this size. They do have a table showing finished measurements, and I really only looked at how finished waist measurement was 0,5 cm larger than my hip width, so I figured 38 would be the right size, though I usually take a smaller size. Should have listened to my gut!

citypants (5)

I think the line drawing is super cute, and those were the proportions I was aiming for. Several problems with that. First, the waist is actually larger than is listed. Measuring the waistband piece I got to 100 cm (not including the seam allowance) instead of the 96,5 listed. Yeah, not a huge difference, but still. I definitely had lots of extra room pulling the pants over my hips, while according to the chart I should only have that half centimetre of wiggle room. Also, I didn’t check the finished hip measurement, which is 110 cm. That fits what I measured my pants to be (flat), but for personal preference I’m more comfortable with a less baggy fit through the hips and crotch.

Speaking of crotch, I felt like there was quite a bit of extra room there. The pleats add volume of course, but the crotch is lower than I would like. In addition, I had a bit of a hard time finding a place the pants sit comfortably, and I keep wanting to pull the front up to flatten out the extra room. I’m thinking that the pants are drafted to sit much higher than I prefer, or for a taller person.

citypants (6)

One thing the line drawing doesn’t show accurately, is that the gathers from the elastic is distributed throughout. I think a flatter front is much more flattering, so I would distribute the gathers more towards the back. That seems to make sense with the side seams too, they were pulling towards the front when I distributed the gathers evenly. If I go ahead and make a muslin I would lower the center front so there is more of a difference front to back. The back piece seems very roomy – especially compared to another very similar pants pattern I’ve picked up. And the side seams are shaped oddly where they meet the waist – look how they bulge out!

citypants (2)

Those were some random thoughts I wrote down while I was in the process of making them. After finishing, save hemming, I decided the pants were roomier than I wanted. I went ahead and shaved off a chunk along the inseam, ending up making the thighs too tight and creating a nice little prominent tent when I sat down. Ugh. At this point I was so annoyed with the pants that I didn’t want to figure out how to save them. Until a year later when I went through my UFO’s and decided it was worth a try.

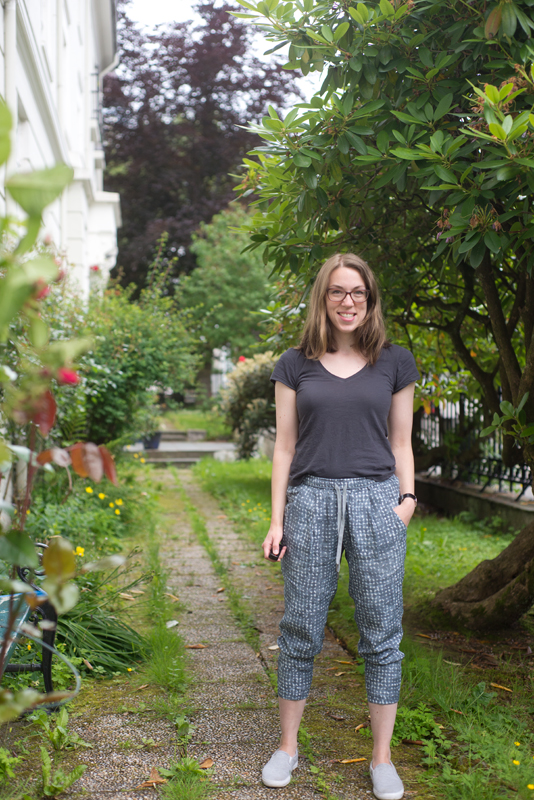
I ended up adding gusset-shapes to raise the crotch point and make more room across the thighs. Haha! Look at the patchwork of pieces! Sorry for the wrinkles – the fabric does wrinkle quite easily. I made elasticized cuffs instead of just hemming. I can’t quite decide if I think these look like pajama pants or not, but so far I’ve enjoyed wearing them! (despite my griping – it’s not my most successful make, but it’s fine). I do like how the waist is done with several channels and elastic – it’s a detail that brings it all up a notch I think.

citypants (11)

citypants (10)Snazzy greenish yellow silk lining for the pockets!

I do really like how combined with my OAL-top (I’ll post more when I have the whole outfit together!) it totally looks like a jumpsuit. I like jumpsuits!

citypants (9)

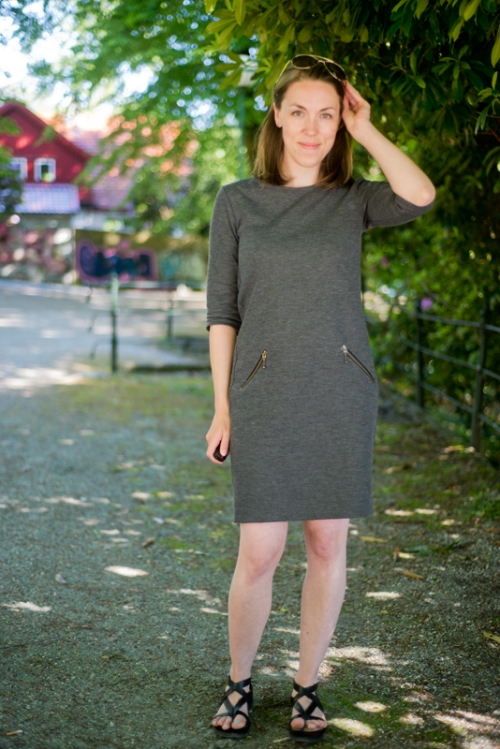
Ahhh… And like this post isn’t wordy enough. The second pants I’m referring to in my punny post title is the one below. It’s from Stoff og stil, pattern number 20028, decommissioned it looks like. It is, like the Alexandria pants, a city pant with pockets partly covered by a pleat, and tapered leg. This one was drafted for a jersey fabric though, and fits much better (I’m sure the fabric is part of the reason). I started sewing these two pants at the same time, and while one sat unfinished on a shelf for a long time, this one has seen weekly wear since being finished. It was interesting to compare the shape of the pattern pieces while working on the two pants, and as with previous experiences with Stoff og stil the drafting has been quite good. I see they now have a UK website too, how exciting! I’ve grown up with their stores and catalogues, and it’s awesome to see how much more on trend they’ve managed to become the last handful of years.
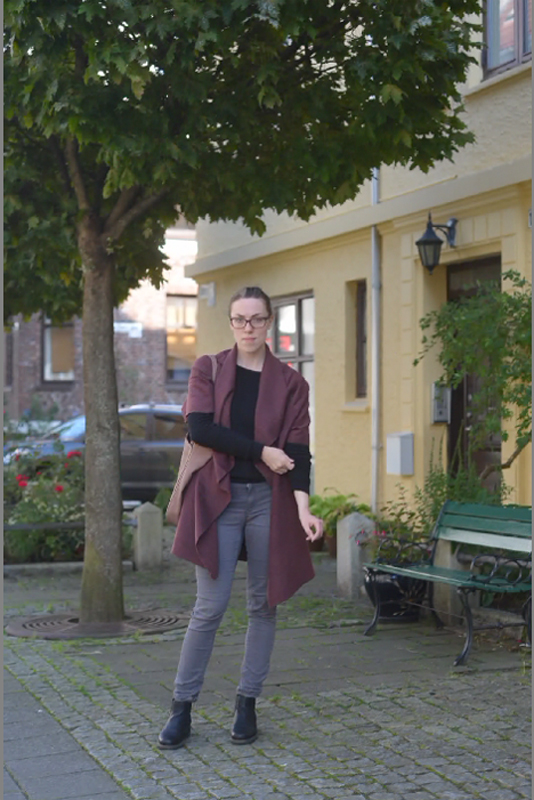
citypants (1)

surprise! it’s a jersey dress with zippered pockets.

grey_jersey_zippered_pockets (7)

I usually have some sort of name for the projects I work on – what I refer to the garment in my head as I’m sewing it, or even what I plan for the blog post title to be, once it’s finished. For this project, I’ve drawn a complete blank. It’s a grey jersey shift dress and it has zippered pockets (same one seen in my UFO-round-up). And that’s it! But that is ok – I feel strongly that this is one my current, quite basic uniform dresses. During college in Chicago I wore alot of skirts+cardigans+belts-combos, and the first few years back in Bergen it was tweaked to dress+cardigans+belts. Cardigans are still very present in my wardrobe, but the dress-style has shifted (ha!) to a straighter shift silhouette with none of the waist definition I’ve done for years. Subtle changes I guess!

grey_jersey_zippered_pockets (5)

grey_jersey_zippered_pockets (4)

I currently have four jersey dresses I wear a lot, three of them I made, and the last is a store-bought dress very similar to this one. I have the mint ruched dress from last fall, the Ikat Hemlock dress from last spring, this grey one that is the point of this post, and for good measure I’ll mention this first midnight blue jersey fitted dress since it was the one to start this streak of jersey dresses, and because it also has the zippered pockets.

Fabric: 1,5 meters-ish of heathered grey courtelle jersey from Stoff & Stil.
Pattern: Hacked, based on this dress pattern from (yet again) Stoff & Stil.
Techniques: Overlocking, binding, gusset, zippered welt pockets.

grey_jersey_zippered_pockets (3)

This dress pattern is really one that keeps giving! I think this is my first tried-and-true pattern, since I don’t usually make multiples. But since I’ve now really tweaked the fit to suit my body and the fabrics I like using, it’s reliable and quick to use. You know, except when I decide to change stuff, and totally make a mess of it all – like with this dress. My intention was a looser shift style dress without a waistseam, so I butted the skirt and bodice pattern pieces next to eachother, and then added what seemed to me an appropriate amount of ease. I really missed the mark there – I tried it on after sewing up the side seams and it was sausage casing tight! To make the addition of a gusset in each side seam look a little more intentional I cut it on the crossgrain.

grey_jersey_zippered_pockets (6)

Having learned from the midnight blue ponte dress, I didn’t even attempt sewing in the zippers by machine, but topstitched around the opening and handsewed in the zipper using backstitch to securely attach it. The pocketing is a nice woven viscose I’ve also used for a pair of pants I recently finished, and I like that it’s matches in color, but is patterned. I’ve noticed that the pockets pull down a bit when I fill them with stuff, which doesn’t happen with the other dress. I’m thinking the waistseam anchors and supports the weight in a way that is less noticeable – you know, it wasn’t a mistake, it is a design feature! ;)

grey_jersey_zippered_pockets (8)Pocketing fabric in a watercolor-like printed viscose. Also, disappointingly, a little pilling despite not having been worn that many times!

So yeah, I don’t have much more to say about the dress. Despite not gushing about it, I do like it very much – I’ve used it at least once a week since finishing it! (I also love the proper summer weather we’ve been granted here in Bergen, and the awesome park that is a stone throw from my apartment. <3 Expect to see more corners from the park in future posts!)

grey_jersey_zippered_pockets (1)

i have plans… OAL-plans

I’m chipping away at my ufo-pile that I posted about last month… um, two months ago (how in the world did that happen?) – I’ve finished the Grainline Portside travel set and just need to stuff it with pillows and photograph it, tackled a few easy repairs, and gotten back into muslin making for the Robson coat. I’ve been telling myself to knock out these unfinished projects before starting anything new, but then Lauren and Andi’s Outfit Along shows up and disturbs all my plans! In the best way, of course.

DSC_7232

Lots of pops of pink on my sewing table! Really my family inherited dining table, but… um, covered in planned and potential sewing projects now. A lovely little corner of my lovely new apartment!

The Outfit Along is a challenge to, between June 1st and July 31st, knit one garment and sew one garment to create a complete outfit. Technically you’re meant to start from scratch, but reading Lauren’s post got me so very inspired to build an outfit around a half-finished cardigan (another Bayview Street Cardigan) that I’ve lacked the drive to finish, so I’m bending the rules as I see fit. :) It took me about ten seconds to decide on a pair of shorts, another ten to realize I had a pattern in my stash that would work well (Simplicity/Built by Wendy 3850 pants), a minute to dig out a fine-waled grey corduroy I think will be perfect, and (I will admit it) a whole day to land on a magenta crinkly chiffon underlined in dark brown-grey chiffon for a sleeveless Pattern Runway Pussy Bow Blouse.

Going through my UFO-pile made me realize I tend to abandon projects when I deviate too much from the pattern or instructions, and run into fitting issues or problems that require a bit of effort to work through. I want to finish these garments that I’m planning, not add to my pile of stuff – so I’ve decided to really hold back on alterations I make to these patterns. For the shorts I’ll raise the center front though, as I’ve seen that is a recurring comment from others who have made it, and for the blouse I want merge the ties and the collar stand instead of having a separate tie. I’ll probably also raise the underarm slightly since the blouse isn’t drafted to be sleeveless.

So, I’m going to finish a longstanding UFO, make two pieces of clothing I’ve been wanting in my wardrobe, using fabrics and patterns from the stash. Win, win, win, win, huh? I’m excited! Anyone else participating in the Outfit Along?

cozy raglan sweater, sort of, finally

black wool raglan (2)

Happy new year! A little belated, but I’m wearing my new (store-bought) sparkly skirt in honor of 2016! I think it will be a good one. I hope you all had a lovely holiday celebration, and rest and good company and good food. But don’t be distracted by the sparkles – it’s actually the black sweater we’re here to look at!

Fabric: 1 m black wool terry
Pattern: Raglan t-shirt, Design #4 in Ottobre magazine 5/2013. I cut a size 38.
Techniques: bias binding, understitching, overlocking.

black wool raglan (8)

First off, pictures of this project is inspired (again) by Gillian’s newest post for better pictures, on taking indoor pictures. It is cold outside, even on my veranda, so getting good indoor pictures until it warms up would be nice! The main tip I took from this post was to find a spot perpendicular to the light source. This means however that my stuff is all visible in the background. Paired with the fact that even at two pm the light is fading here, I opted to use the aperture priority setting with a small aperture (f 1.8) that would let in the most light, and blur out the background the most. I don’t know if this affected the autofocus, of if it was where in the frame I was standing, or my sweater being black, but I’ve never had to delete so many totally out of focus pictures! This was a hard one for my camera, poor thing.

black wool raglan (6)

black wool raglan (3)

This fabric is crazy cosy. I got a metre of this stuff at a school where I taught sewing as a substitute teacher this spring, and it’s from a local factory that produces wool clothing. I really like the slight horizontal striations, it gives what is really just black jersey a little bit of texture. The fiber is pure wool, and I would call it a terry – it has all those little loops on the backside,  so it’s super toasty! I knew right away that it would turn into a casual Grainline Linden-like sweater. (Or, as I like to put it, the fabric told me what kind of garment it wanted to be!)

I like to be able to use patterns from my stash when possible, so while I don’t have a huge stash, but I did find a raglan top in an Ottobre magazine that I chose to use. The pattern, #4 in the autumn/winter 5/2013 issue, is really a t-shirt pattern, so I knew I needed to make a couple of changes to get the casual sweater fit I wanted. For one, I had to add my own cuffs, hem and neckline bands, and I decided to size up to get a roomier fit than the t-shirt was intended for. Also, the pattern had a dart at the shoulder for shaping, which I didn’t want, so I slashed and spread. I messed this bit up. I ended up adding length at the front between the armpit and shoulder – length that wasn’t appropriate to add, and got a funnelneck thing going on! Not good. I unpicked, overlapped, and trimmed the neckline down, and that helped. I could not get the neckband to look decent though, so I finally just attached it as a binding instead. I eased the shoulders in especially during this step, which also helped, but I can see the binding makes the neckline a little bulky, and it still wants to stick up a little bit. I have the same thing happening on my ikat Hemlock dress – I’m thinking binding in a lighter weight jersey like on my recent Bettine dress is a good solution. Oh, and also note the little piece of ribbon I put in. It’s mainly meant to help me quickly tell the front from the back, but I also think it’s a nice little touch!

black wool raglan (1)

black wool raglan (4)

Take notice of my face in the picture above – it’s my “seriously camera, will you focus and take a picture now, if I move a little to the left?”-look. But it also shows the back raglan sleeve, which I think has a nice line (nicer than the front, but that’s mainly my fault). While I was making this I was not really pleased with how the sweater was looking. I thought the sleeves were too slim, the neckline and shoulder fit was a mess, and the sleeves were really long after adding cuffs rather than folding and hemming them. And don’t I actually look better in dropped shoulder styles rather than raglan? The width of the hem band was due to how much fabric I had left, and it doesn’t look entirely proportionate in my eyes. The fabric isn’t the stretchiest, so cutting the cuffs and hem band from a narrower width of self fabric is only partly successful. I mean, it works, but not super well. For example – I can’t pull the sleeves up more than 2 inches above my wrist – the cuff is then stretched to its maximum! Oh well.

For all my hesitations and second-rate solutions I have ended up with a perfectly wearable and undeniably cozy sweater. I actually like slim sleeves; the extra length is something I really love in sweaters; and the neckline would probably look a little constricting with the added band, as was the original plan. It’s not perfect, and this post certainly contains a fair amount of what Karen cleverly dubs ablogogising (oh how I enjoy Karen’s writing!) – pointing out the errors in my make. But, it is cozy and warm. And I’ve worn it for three straight days. Let’s call it reluctantly, eventually, finally a success, shall we?

black wool raglan (7)